How to Dry Liver for Dog Treats
- Houndsy
Table of Contents
- Introduction
- The Appeal of Liver as a High-Value Treat
- Choosing the Right Type of Liver
- Preparing the Liver for Drying
- How to Dry Liver in the Oven
- How to Use a Dehydrator for Liver Treats
- Ensuring Safety and Quality
- Storing Your Homemade Treats
- Integrating Treats into a Healthy Routine
- Troubleshooting Common Issues
- The Design-Forward Kitchen
- Transitioning to Homemade
- Frequently Asked Questions
Introduction
We have all been there: standing in the pet store aisle, staring at a small bag of freeze-dried liver treats that costs more than our own lunch. You want the best for your dog, especially when it comes to high-value rewards for training, but the price tag and the mystery ingredients in some commercial options can be a bit much. At Houndsy, we believe that providing for your dog should be a source of joy, not a source of frustration or clutter in your kitchen. If you want a more polished daily setup, the Houndsy Kibble Dispenser keeps feeding simple and beautiful.
Making your own treats is one of the most rewarding ways to bond with your pet while ensuring they get exactly what they need. Liver is often called "dog candy" because of its intense aroma and flavor, making it the perfect tool for teaching new tricks or rewarding good behavior. If you want more guidance on choosing rewards, What Treats to Use for Dog Training is a helpful companion read. This post covers the specific techniques for drying liver at home using your oven or a dehydrator, how to store it safely, and how to integrate these rich treats into a healthy feeding routine. By the end of this guide, you will know how to create professional-quality, shelf-stable liver treats that your dog will absolutely love.
The Appeal of Liver as a High-Value Treat
Before we get into the "how," it is helpful to understand why liver is such a staple in the world of dog training. Most dogs are motivated by scent more than anything else. While a standard biscuit might be fine for a casual "sit" in the living room, a high-distraction environment like a busy park requires something more potent.
Liver has a very high protein content and is packed with essential nutrients like Vitamin A, B vitamins, and iron. Because it is an organ meat, it has a much richer profile than standard muscle meat. Many dog owners find that even the pickiest eaters will perk up the moment a bag of dried liver is opened.
Key Takeaway: Dried liver is considered a "high-value" treat because its strong scent and rich flavor can maintain a dog’s focus even in distracting environments.
Choosing the Right Type of Liver
When you head to the grocery store or local butcher, you will likely see a few different options. The most common choices for drying are beef liver and chicken liver. Both work exceptionally well, but they offer slightly different experiences for the "chef."
Beef Liver is usually sold in large, flat lobes. It is firm and relatively easy to slice into uniform strips once it is partially frozen. This makes it the go-to choice for creating those perfect, square training bites or long jerky-style strips.
Chicken Liver is much smaller and softer. It can be a bit more finicky to handle because of its delicate texture. However, it is often more affordable and has a slightly milder flavor that some dogs prefer.
Regardless of which one you choose, look for liver that is deep red and looks fresh. If you have access to a local butcher, asking for grass-fed or organic options can provide peace of mind about the quality of the meat you are bringing into your home.
Preparing the Liver for Drying
Preparation is the most important step in the process. If you have ever tried to slice raw liver, you know it can be slippery and difficult to manage. For a broader homemade-recipe walkthrough, How to Make Dog Training Treats pairs nicely with the method below. To get the best results, we recommend a few simple preparation steps to make the process cleaner and more consistent.
The Semi-Freeze Technique
The secret to perfectly uniform treats is a brief stay in the freezer. Place the raw liver on a parchment-lined baking sheet and pop it into the freezer for about 45 to 60 minutes. You do not want it frozen solid; you want it "firm."
When the liver is firm to the touch, it behaves much more like a soft block of wood than a slippery piece of meat. This allows you to use a sharp knife to cut very thin, consistent slices. Consistency is vital because pieces of different thicknesses will dry at different rates, leading to some being burnt while others remain dangerously damp.
Slicing for Your Dog's Size
Think about how you plan to use these treats. If you are doing intensive clicker training, you want tiny, pea-sized morsels so you can reward frequently without overfeeding. If you want a longer-lasting snack, thin strips or "jerky" shapes are better.
- For Training: Slice into 1/4-inch cubes.
- For Snacking: Slice into 1/8-inch thick strips, about 2 inches long.
Quick Answer: The best way to dry liver for dog treats is to slice partially frozen liver into thin, uniform pieces and bake them at a low temperature (around 200°F) for 2 to 3 hours until they are firm and leathery.
How to Dry Liver in the Oven
Most of us will use the oven for this process. It is convenient and requires no special equipment. The goal here is not to "cook" the liver in the traditional sense, but to slowly evaporate the moisture until the meat is preserved.
Step-by-Step Oven Method
Step 1: Preheat and Prepare Preheat your oven to its lowest possible setting. For most modern ovens, this is between 170°F and 200°F. Line a large baking sheet with parchment paper or a silicone mat. Do not use oil or non-stick spray, as the fat can go rancid and shorten the shelf life of the treats.
Step 2: Arrange the Pieces Lay your sliced liver pieces out in a single layer. Make sure none of them are touching or overlapping. Air needs to circulate around every surface of the meat to dry it properly.
Step 3: The Drying Process Place the tray in the oven. If your oven has a convection setting, turn it on; the moving air helps speed up evaporation. Depending on the thickness of your slices, the process will take anywhere from 2 to 4 hours.
Step 4: The Flip About halfway through, use tongs to flip each piece. This ensures the bottom doesn't stay moist while the top gets crunchy.
Step 5: Testing for Doneness Take a piece out and let it cool for a minute. A finished treat should feel firm and leathery, or even "snappy" if you prefer a crunchier texture. If it feels squishy or soft in the middle, it needs more time.
How to Use a Dehydrator for Liver Treats
If you plan on making treats regularly, a food dehydrator is a worthwhile investment. It is often more energy-efficient than running a full-sized oven for four hours, and it provides much better airflow.
Step-by-Step Dehydrator Method
Step 1: Set the Temperature Set your dehydrator to 160°F. This is the standard safety temperature for drying meats to ensure any potential bacteria are neutralized while preserving the nutrients.
Step 2: Load the Trays Place the liver slices on the dehydrator trays. Again, leave space between the pieces. If you are using chicken livers or very small beef bits, you may need a fine-mesh tray liner so they do not fall through the grates as they shrink.
Step 3: Wait it Out Dehydrating takes longer than oven-drying because the temperature is lower. Expect the process to take between 6 and 10 hours. The benefit here is that it is much harder to "burn" the treats in a dehydrator.
Step 4: Check and Cool Once the treats are dark and have a matte finish, they are done. Let them cool completely on the trays before moving them to storage.
Ensuring Safety and Quality
Whenever you are working with organ meats at home, safety should be a priority. Liver is very nutrient-dense, and the drying process concentrates those nutrients even further.
Managing the Aroma
We have to be honest: drying liver smells. Your dog will think the kitchen is a five-star restaurant, but you might find the scent a bit overwhelming. To manage this, ensure your kitchen is well-ventilated. If you are using a dehydrator, some people prefer to run it in the garage or a utility room.
Avoiding Vitamin A Toxicity
While liver is healthy, it is possible to have too much of a good thing. Liver is exceptionally high in Vitamin A. In very large quantities, this can lead to a condition called hypervitaminosis A.
As a general rule, treats should make up no more than 10% of your dog's daily caloric intake. Because liver is so rich, many owners find it best to limit liver treats to just a few small pieces a day, or use them exclusively for special training sessions.
Bottom line: Drying liver requires low heat and plenty of time to remove moisture, which preserves the meat and intensifies the flavor that dogs love.
Storing Your Homemade Treats
One of the frustrations of homemade treats is that they do not contain the artificial preservatives found in store-bought bags. This means how you store them is critical to preventing mold and spoilage.
Short-Term Storage
If you have dried the liver until it is very crunchy and brittle, it can stay in an airtight container at room temperature for about 3 to 5 days. However, if the treats have any "bend" or moisture left in them, they must be refrigerated. We recommend keeping a small "working" batch in a sealed jar on the counter and the rest in the fridge.
Long-Term Storage
For larger batches, the freezer is your best friend. Dried liver treats freeze beautifully and can last for up to six months. You can pull out a handful as needed, and because they are low in moisture, they thaw in just a few minutes.
At Houndsy, we understand that maintaining a consistent routine is part of being a great dog owner. Just as you want your dog's treats to stay fresh, you want their main meals to be consistent. This is why we designed the Houndsy Kibble Dispenser with a BPA-free liner that keeps kibble fresh and protected. Using a high-quality storage solution for their treats and their daily meals ensures that every bite they take is as nutritious as the first.
Integrating Treats into a Healthy Routine
It is easy to get carried away when you see how much your dog loves these treats. However, a healthy dog is a dog with a balanced diet. Homemade liver treats should be a supplement to, not a replacement for, a well-portioned meal. If you want more guidance on daily servings, Understanding How Much Food to Feed Your Adult Dog is a useful companion read.
Perfecting the Portion
When you introduce high-value treats into your routine, you might need to slightly adjust their main meal portions to account for the extra calories. This is where precision becomes your best friend.
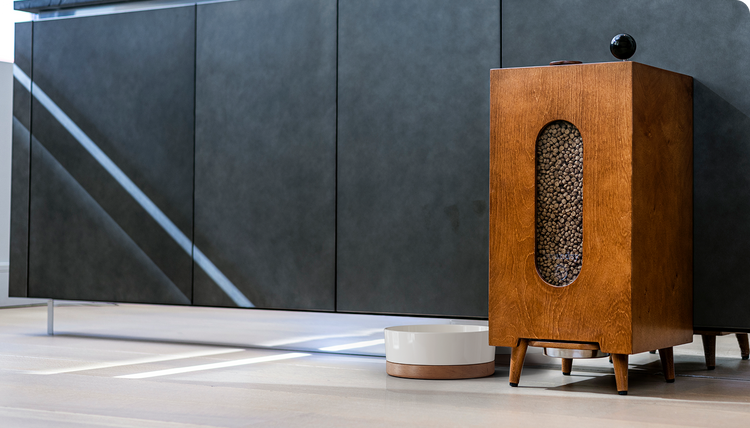
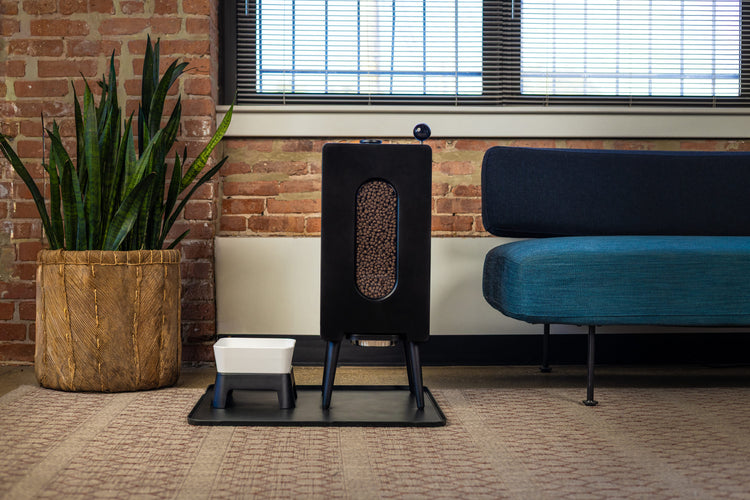
Many owners struggle with "scoop creep," where a little extra kibble slips into the bowl every day. We solved this problem by creating a standing-height crank mechanism. Every turn of our perfect-portions feeder provides a consistent, perfect portion. This allows you to be generous with your homemade liver treats during training because you know exactly how much food your dog has already eaten at breakfast.
Consistency is Key
Dogs thrive on predictability. Whether it is the time of day they get their walk or the way they are fed, a stable routine reduces anxiety and improves behavior. Using your homemade treats as a reward for specific actions—like sitting calmly while you prepare their dinner—strengthens the bond between you and your pet.
Key Takeaway: Balancing high-value treats with a consistent, well-measured daily diet is the secret to a healthy weight and a happy dog.
Troubleshooting Common Issues
If your first batch doesn't come out perfectly, don't worry. Here are a few common issues and how to fix them:
- Treats are too hard: You may have sliced them too thin or left them in the oven too long. They are still perfectly safe for your dog to eat, though they might require a bit more chewing.
- Treats are moldy: This happens when there is still moisture inside the meat. Next time, dry them longer or store them in the freezer immediately.
- The smell is too strong: Try soaking the raw liver in milk for an hour before drying. This is an old chef's trick to mellow out the metallic scent of organ meats.
The Design-Forward Kitchen
Making dog treats shouldn't feel like a chore that leaves your kitchen looking like a mess. Part of the Houndsy mission is to make the dog-owning experience feel like a natural, beautiful part of your home. If you'd like to see the story behind that mission, our About Us page shares how Houndsy brings together ergonomic design and modern aesthetics.
When you have a dedicated space for treat-making and a beautiful, mid-century modern Houndsy Kibble Dispenser on your floor, the daily rituals of pet care become something you can take pride in. You no longer have to hide ugly plastic bins or bags of treats in the pantry. Everything has its place, and everything looks great.
Transitioning to Homemade
If your dog has a sensitive stomach, introduce liver treats slowly. Start with one or two small pieces and monitor their digestion over 24 hours. Because liver is rich, some dogs might experience soft stools if they eat too much too fast.
Once you see how well they tolerate it, you can start using the treats for more complex training. If you want another homemade treat idea, Delicious and Nutritious Homemade Healthy Dog Treats is a great next stop. You will likely find that your dog is more attentive and eager to learn when the reward is something you made specifically for them.
| Feature | Oven Drying | Dehydrator |
|---|---|---|
| Temperature | 170°F - 200°F | 160°F |
| Time | 2 - 4 hours | 6 - 10 hours |
| Effort | Low (needs monitoring) | Very Low (set and forget) |
| Result | Can be crunchy or leathery | Usually more uniform |
Frequently Asked Questions
Can I dry liver without an oven or dehydrator?
It is not recommended to air-dry meat at room temperature due to the risk of bacterial growth and spoilage. Using a controlled heat source like an oven or dehydrator ensures the meat reaches a safe temperature to kill pathogens while effectively removing moisture.
How long do homemade dried liver treats last?
If kept in an airtight container in the refrigerator, they typically last for about two weeks. For longer storage, you can keep them in the freezer for up to six months. Always check for any off-smells or signs of mold before feeding them to your dog.
Is it okay to give my dog liver every day?
Yes, in small amounts. Liver is a nutrient powerhouse, but it is very high in Vitamin A. It should be treated as a supplement or a high-value reward, making up only a small fraction of their daily diet to avoid nutrient imbalances.
Why did my liver treats turn out greasy?
Liver contains fat, and when heated, that fat can seep to the surface. To minimize this, use lean beef liver and pat the slices dry with a paper towel before putting them in the oven. If they still feel greasy after drying, blot them again before storing. If you want the rest of your feeding routine to stay just as tidy, our kibble dispenser helps keep portions steady and kibble protected.